JavaFX Flat Custom Windows - Part 1
July 2, 2016
JavaFX provides platform-specific chrome around its windows by default. When a Stage is created or the primary Stage is accessed in an Application subclass' start() method, it is initialized to use the windowing style StageStyle.DECORATED. This produces a different look-and-feel across platforms. For example, the close and the size buttons of a JavaFX app run on a Mac are rounded and placed to the left.
Creation and a Close Button
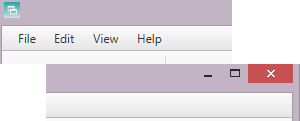
The following screenshots show the same program's windowing controls on three different platforms: Windows, Mac, and Linux. Windows has a square style with the window control buttons aligned to the upper right.
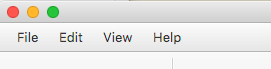
The Mac has a rounded style with the window control buttons aligned to the upper left.
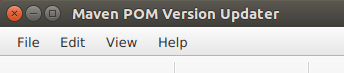
Like the Mac, Ubuntu 16.04 has a rounded style but the window title is also aligned to the upper left rather than centered.
While this makes the JavaFX app appear more like other apps on a given platform, it does introduce a problem during documentation for support and marketing. Screenshots may appear out-of-sync with the platform on which the user is running or a demo is being given.
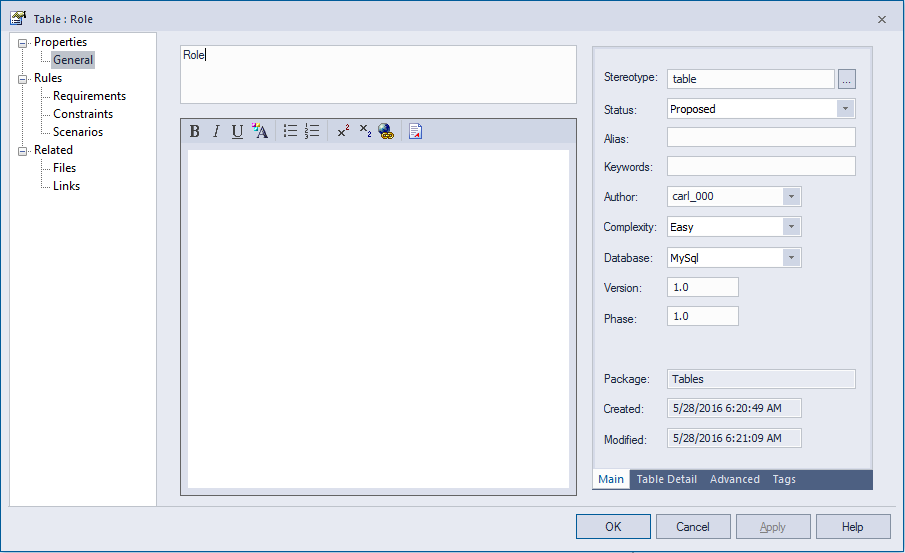
I've also noticed a trend in modern apps such as the current versions of Sparx Systems Enterprise Architect and TechSmith SnagIt. These apps prefer their own windowing styles from a branding perspective than the defaults. Rather than share the common appearance with other apps, the app vendors carry styling beyond the window contents onto the windowing controls and title bar.
TechSmith Snagit is a tear-away window. The SnagIt window is radically different than the standard window and supports an always-present mode of operation.
Setup
In an IDE, create a new project. Since there are no external dependencies in this project, this can be a plain Java project.
UI Elements
Start by creating the UI elements in Scene Builder.
- Open Scene Builder and save the file as "FlatWin.fxml" to the resources folder of the project.
- Drag a VBox onto the canvas.
- Drag 3 Labels into the VBox.
- Select the first Label and enter the value "Flat Win" for its Text in the Properties Tab.
- Select the second Label and enter the value "X" for its Text.
- Select the third Label and enter the value "Content" for its Text.
- Select the first two Labels, right-click, and select Wrap In > HBox from the context menu.
- Select the first Label (Flat Win), right-click, and select Wrap In > HBox from the context menu.
- Select the second Label (X), right-click, and select Wrap In > HBox from the context menu.
- Select the third Label (Content) and select Wrap In > VBox from the context menu.
- Select the HBox containing the Label "Flat Win", set the Alignment to CENTER in the Properties Tab. In the Layout Tab, set Hgrow to ALWAYS.
- Select the HBox containing the Label "X", set the Alignment to CENTER in the Properties Tab. In the Layout Tab, set the Pref Width to 20.
- Select the VBox containing the Label "Content", set the Alignment to CENTER in the Properties Tab. In the Layout Tab, set the Vgrow to ALWAYS.
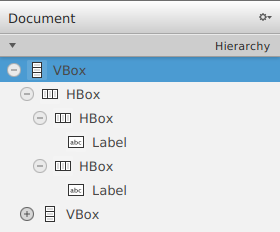
The resulting Hierarchy in Scene Builder should look like the following.
Next, layout the UI elements. Notice the extensive use of container (VBox, HBox) settings to center and space the Labels.
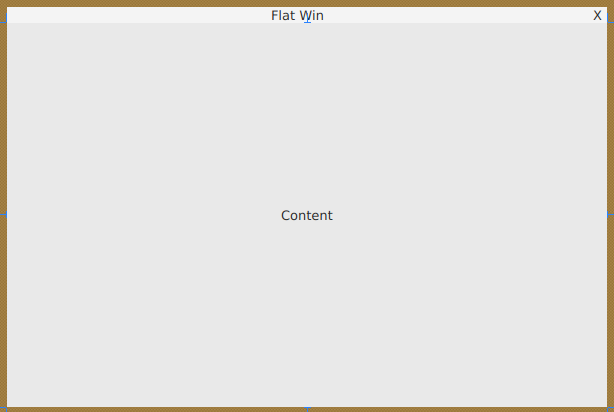
The resulting canvas in Scene Builder should look like the following.
Controller
Create the JavaFX controller class for the .fxml file.
- In the source directory of your project, create a package net.bekwam.bkcourse.flatwinapp.
- In the package, create a class FlatWinController.
- Add the following method to the controller class.
- In Scene Builder, expand the Controller tab and set the Controller class property to net.bekwam.bekcourse.flatwinapp.FlatWinController.
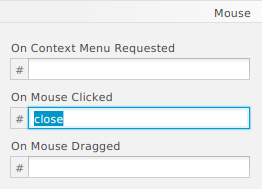
- Select the X Label, expand the Code tab, and set the On Mouse Clicked property to "close" (the method listed above).
  @FXML
  public void close(MouseEvent evt) {
    ((Label)evt.getSource()).getScene().getWindow().hide();
  }
Styles
When styling on a larger monitor, I like to display both Scene Builder and my IDE containing the stylesheet side-by-side. Style changes in the IDE take immediate effect in Scene Builder. This helps to avoid unneeded tabbing. To accommodate the half-sized screen in Scene Builder, I use View > Zoom > 50% to shrink the canvas.
- In your IDE, add a stylesheet "fw.css" to the resources directory in your project.
- In Scene Builder, associate the stylesheet fw.css to the FXML file FlatWin.fxml by selecting Preview > Scene Style Sheets > Add a Style Sheet. Navigate to fw.css and select it.
- Enter the following styles in fw.css.
- Go back to the IDE, select the first HBox (the one containing the two other HBoxes), open the Properties Tab, and under the Style Class use the drop down to select the newly-added .title-bar style.
- Enter the following styles
- In Scene Builder, select the Label with text "Flat Win". Using the arrow key select the Style Class .title.
- Select the Label with text "X". Using the arrow key, select the Style Class .close-button.
- You should see the green background and white fonts take immediate effect.
- You can also test the display of the hover setting in Scene Builder. Go to Preview > Show Preview in Window.
- Place the mouse over the close button "X". You should see a border surround the focused Label.
.title-bar {
  -fx-padding: 10px;
  -fx-background-color: darkgreen;
 }

.title-bar Label {
  -fx-text-fill: white;
}
.title, .close-button {
  -fx-font-family: Arial;
  -fx-font-weight: 700;
}

.title {
  -fx-font-size: 18px;
}

.close-button {
  -fx-font-size: 12px;
  -fx-padding: 1px;
}

.close-button:hover {
  -fx-border-color: white;
  -fx-border-size: 1px;
  -fx-border-style: solid;
}
Application Subclass
Create the JavaFX Application subclass. Notice the initStyle() call using StageStyle.UNDECORATED which removes the stock windowing title bar and controls. UNDECORATED does not provide a shadow for the app when run on Windows, so there is a Windows hack shipped along with the source. The Application subclass will apply a hack to add a shadow and set the StageStyle to TRANSPARENT.
- In the flatwinapp package, create a new class FlatWinApp.
- Add this basic definition which extends the Application class, loads the FXML file, associates the stylesheet, and displays the window.
- Run the FlatWinApp class. Close the app by selecting the close button in the upper right.
public class FlatWinApp extends Application {

    @Override
    public void start(Stage primaryStage) throws Exception {

      Parent p = FXMLLoader.load( FlatWinApp.class.getResource("/part3/finish/FlatWin.fxml"));

      Scene scene = null;

      String osName = System.getProperty("os.name");
      if( osName != null && osName.startsWith("Windows") ) {

        //
        // Windows hack b/c unlike Mac and Linux, UNDECORATED doesn't include a shadow
        //
        scene = (new WindowsHack()).getShadowScene(p);
        primaryStage.initStyle(StageStyle.TRANSPARENT);

      } else {
        scene = new Scene( p );
        primaryStage.initStyle(StageStyle.UNDECORATED);
      }

        scene.getStylesheets().add("part3/finish/fw.css");

        primaryStage.setTitle("flatwinapp");
        primaryStage.setScene( scene );
        primaryStage.setMinHeight(200.0d);
        primaryStage.setMinWidth(300.0d);
        primaryStage.show();
      }

      public static void main(String[] args) {
        launch(args);
      }
}
This is the WindowsHack class which can be put in the same package.
public class WindowsHack {

  public Scene getShadowScene(Parent p) {
    Scene scene;
    VBox outer = new VBox();
    outer.getChildren().add( p );
    outer.setPadding(new Insets(10.0d));
    outer.setBackground( new Background(new BackgroundFill( Color.rgb(0,0,0,0), new CornerRadii(0), new
      Insets(0))));

    p.setEffect(new DropShadow());
    ((VBox)p).setBackground( new Background(new BackgroundFill( Color.WHITE, new CornerRadii(0), new Insets(0)
    )));

    scene = new Scene( outer );
    scene.setFill( Color.rgb(0,255,0,0) );
    return scene;
  }
}
The result should look like the following.
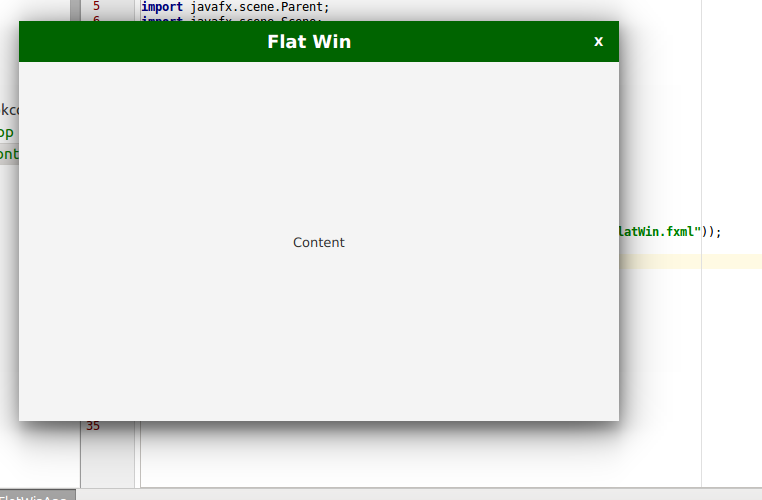
This article provided the basics for creating a flat-styled, custom window. Scene Builder was used to create the UI element structure. CSS was linked in to assist with the layout and to set the colors and fonts. A controller class provided a close method and the Application sublcass instantiated everything.
Part 2 will add important moving functionality that will allow the user to reposition the window by dragging from the title bar. Continue with the project created in this article or use the starter classes in the part2 package to reset.
Series Links
Resources
The source code presented in this article series is a Gradle project found in the zip file below. The zip file is packaged with the Gradle Wrapper, so no additional installation is required.
To run the demo application without an IDE
- Extract the zip file
- If on Linux or Mac, run
chmod u+x gradlew - If on Linux or Mac,
run ./gradlew runFinal - If on Windows, run
gradlew.bat runFinal
To run the demo in an IDE as in the video, import the project source as an existing Gradle project.

By Carl Walker
President and Principal Consultant of Bekwam, Inc