WildFly RESTful Development with IntelliJ and Maven
January 1, 2019
Developing a RESTful API is a great way to expose your backend data and business logic to consumers. Those consumers might be internal development staff building websites, mobile apps, or batch and desktop programs. Additionally, those consumers might be external integration partners. Since users can simply chuck a URL in the browser to test or study a RESTful service, REST adoption has been strong in and out of the Java ecosystem.
This article shows how to develop RESTful Web Services for the WildFly platform. The services will be built using Maven which to support Continuous Integration. The development environment is the IntelliJ IDE which allows for some optimizations to make development more rapid.
This article is on the IntelliJ Ultimate Edition which is the commercial (not free) edition. Ultimate is needed for the JBoss connector.
Maven and Project Setup
While you can use IntelliJ selections or Maven Archetypes to for your initial pom, I prefer to build it from hand to make sure that it matches other poms that I'm supporting. To create the initial project
- Start IntelliJ
- Select New > Project
- Select Maven
- Provide Group and Artifact IDs. This article uses "org.bekwam" for the Group and "wf15-restful-devenv-demo" for the Artifact ID.
- Specify the path. I re-insert the dashes that IntelliJ strips from the path so that that the Artifact ID matches the folder.
- Double click on the generated pom.xml to edit it.
- Add packaging=war.
- Add the resteasy dependency. Make sure that the scope=provided as WildFly contains the libraries needed to run JAX-RS services.
- Add the compiler properties for Java 8. Otherwise, the default will be 5 and flag many legal 8 constructs.
- Add the plugin to tell Maven that the WAR will not contain a web.xml. (The web.xml isn't required for this version of JavaEE.)
The resulting pom is listed below.
<?xml version="1.0" encoding="UTF-8"?>
<project xmlns="http://maven.apache.org/POM/4.0.0"
         xmlns:xsi="http://www.w3.org/2001/XMLSchema-instance"
         xsi:schemaLocation="http://maven.apache.org/POM/4.0.0 http://maven.apache.org/xsd/maven-4.0.0.xsd">
    <modelVersion>4.0.0</modelVersion>

    <groupId>org.bekwam</groupId>
    <artifactId>wf15-restful-devenv-demo</artifactId>
    <version>1.0-SNAPSHOT</version>
    <packaging>war</packaging>

    <dependencies>
        <dependency>
            <groupId>org.jboss.resteasy</groupId>
            <artifactId>resteasy-jaxrs</artifactId>
            <version>3.6.2.Final</version>
            <scope>provided</scope>
        </dependency>
    </dependencies>

    <properties>
        <maven.compiler.source>1.8</maven.compiler.source>
        <maven.compiler.target>1.8</maven.compiler.target>
    </properties>

    <build>
        <plugins>
            <plugin>
                <groupId>org.apache.maven.plugins</groupId>
                <artifactId>maven-war-plugin</artifactId>
                <version>3.2.2</version>
                <configuration>
                    <failOnMissingWebXml>false</failOnMissingWebXml>
                </configuration>
            </plugin>
        </plugins>
    </build>

</project>
RESTful Web Services Code
With the project set up, the next step is to add some code. The minimal JAX-RS service requires a resource, the source file that will implement the service, and an application which makes WildFly aware of the set of services. This particular service will return a hardcoded text string to the caller and can be tested by putting a URL in a browser.
HelloWorldResource.java is a class that associates the /hello URL path with a set of methods. In the class below, there is only one method which will respond to an HTTP GET at the toplevel /hello URL. Other HTTP methods such as POST or DELETE can also be associated with Java methods. Additional subpaths can also be mapped to Java methods (for example, /hello/carl could map to a different Java method).
- In the Project Browser, expand the src/main/java folders.
- Right click the java folder. Select New > Package. Name the package "hw".
- Right click the new hw package. Select New > Java Class.
- Name the class HelloWorldResource and double-click to edit. Add the code from the HelloWorldResource listing below.
- Right click on the hw package. Select New > Java Class.
- Name the class APIApplication an double-click to edit. Add the code from the APIApplication listing below.
HelloWorldResource.java Listing
package hw;

import javax.ws.rs.GET;
import javax.ws.rs.Path;
import javax.ws.rs.Produces;
import javax.ws.rs.core.MediaType;

@Path("/hello")
public class HelloWorldResource {

    @GET
    @Produces(MediaType.TEXT_PLAIN)
    public String getMessage() { return "Hello, World! 3"; }
}
APIApplication.java Listing
package hw;

import javax.ws.rs.ApplicationPath;
import javax.ws.rs.core.Application;
import java.util.HashSet;
import java.util.Set;

@ApplicationPath("/api")
public class APIApplication extends Application {

    @Override
    public Set<Class<?>> getClasses() {
        Set<Class<?>> set = new HashSet<>();
        set.add( HelloWorldResource.class );
        return set;
    }
}
WildFly Runtime
Running WildFly through the IntelliJ IDE provides a convenient way to publish service changes. After making a change and visually verifying that there are no compilation errors, I use a single key combo Ctrl+F10 to redeploy the app for testing. If you're not using IntelliJ, you can add the WildFly Plugin to the pom and use a wildfly:redeploy goal from a command line to redeploy. IntelliJ avoids having to switch between editor, Maven command line, and WildFly logger windows since all of these functions are integrated.
To follow these procedures, you'll need a WildFly distribution extracted on your harddisk. I'm setting up the app server as "Local" although there is a "Remote" option. However, there are extra steps need to set up the remote administration functionality.
- Go to Run > Edit Configurations.
- Select + > JBoss Server > Local.
- Name the configuration (for example "WF15")
- Press Configure and browse to the installation path of WildFly.
- Go to the Deployment tab and add the exploded WAR
- Go back to the Server tab and select "Redeploy" from On 'Update' action; uncheck the "Show Dialog"
- Run the configuration
- WildFly will start and deploy the exploded WAR. A server tab "WF15" will appear at the base of the IDE.
This screenshot shows the Application Servers window on top of the Run/Debug Configurations window. Use the values to verify the previous sequence of steps if the app server does not start.

Testing
A browser with "Forbidden" will be displayed. Since there is not content in the top level path (ex, not index.html file), this is ok.
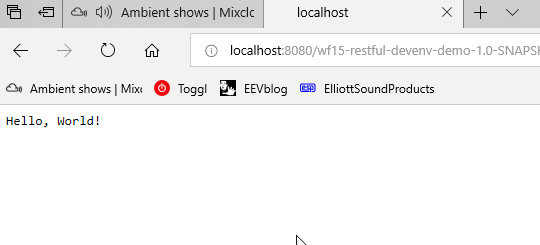
- Append "api/hello" to the browser URL. In this example, the full URL is http://localhost:8080/wf15-restful-devenv-demo-1.0-SNAPSHOT/api/hello.
To make changes to the service, edit the source files and then redeploy with the keyboard shortcut Ctrl+F10.
While the commercial IntelliJ Ultimate Edition isn't required for developing RESTful web services, it does provide an integrated convenience by locating the WildFly app server log and redeploy command in a single app. Make your edits, visually check the syntax for errors, and hit Ctrl+F10 to redeploy. To develop this without the IDE, say with a text editor, would require a two or three command line windows for running the app server, viewing the log, and issuing Maven commands. However, even with IntelliJ, Maven support is still important to provide an IDE-neutral project and one that is able to be built by Continuous Integration / Continuous Deployment servers.

By Carl Walker
President and Principal Consultant of Bekwam, Inc