Filtering in a JavaFX ListView
September 30, 2016
This article describes how to apply a filter to the contents of a JavaFX ListView. A model component manages two ObservableLists of Player objects. One list is the comprehensive set of Player objects. The second list is the basis for the ListView and is potentially limited by a filter. The application uses ToggleButtons to apply different filters to the displayable list.
The article further demonstrates the filtering action by presenting add and remove functionality. There is a ContextMenu for the delete operation and a custom dialog for the add operation.
This video demonstrates the completed app. A list of baseball players is displayed on startup. Pressing the ToggleButtons across the top of the screen applies different filters to the ListView. Pressing the + Button brings up a custom dialog that adds a Player to the ListView. A right-clicking on a particular Player brings up a Delete ContextMenu for the remove operation.
Scene Builder
The following screenshot shows the main view of the FilterListApp.

The UI root is a VBox that contains an HBox for the top controls and the ListView. The top controls – a set of ToggleButtons and a + Button -- are themselves grouped in HBoxes to align the UI properly on a resize operation. The HBox containing the ToggleButtons will fix the ToggleButtons to the left on a resize while the + Button will pull to the right.
The set of the ToggleButtons present in the FXML exists as a design aid. These ToggleButtons will be removed when the app starts and replaced with the real values: Show All, BOS, HOU, WSH. It is important to fully visualize the UI in Scene Builder and adding placeholder objects helps along these lines.
This next screenshot shows the dialog that opens when the + Button is pressed.
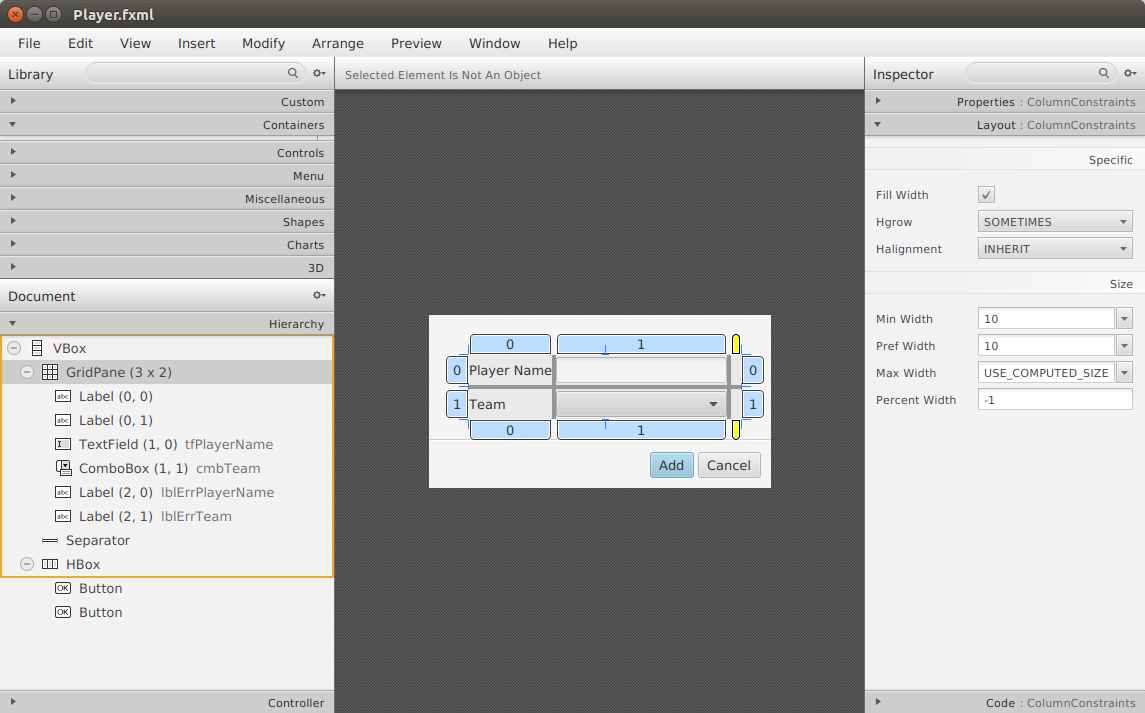
The dialog contains a top GridPane for the data gathering controls and a lower HBox for the Add and Cancel Buttons. The data gather controls are a TextField for the Player Name and a ComboBox for the Team selection. Both are required for the Add to take effect.
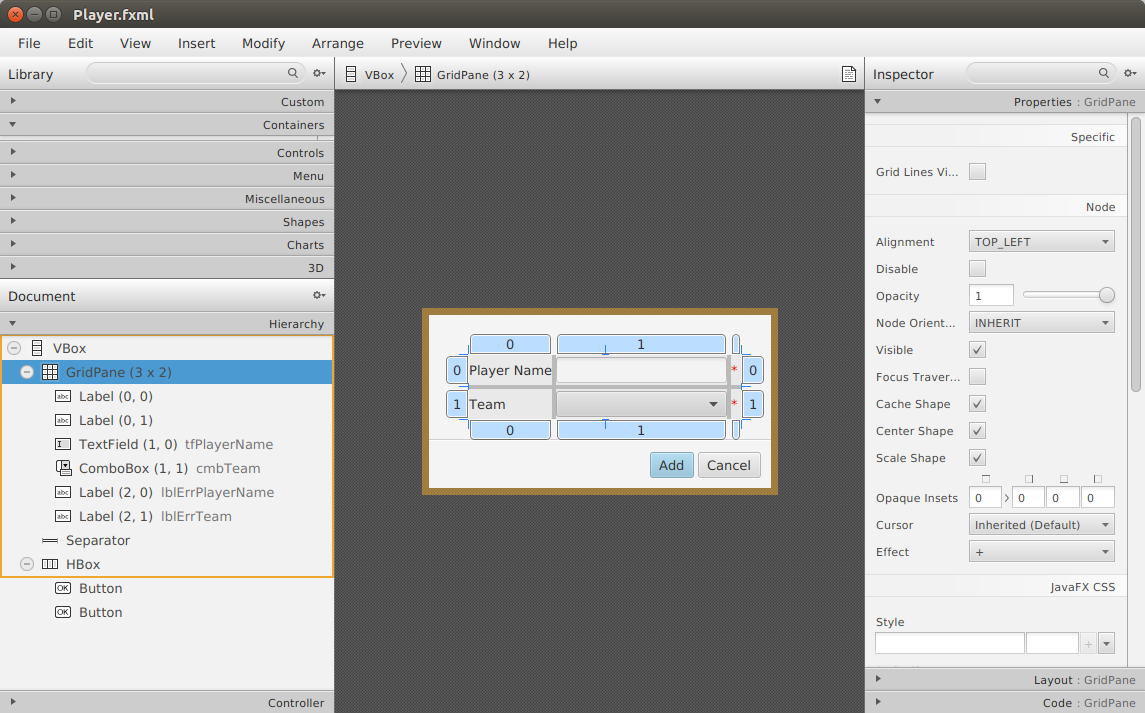
Notice in the GridPane that there is a thin column to the right of the data gathering controls. This column contains a pair of Labels: lblErrPlayerName, and lblErrTeam. These Labels are red asterisks that are hidden unless there are validation errors. The preceding screenshot showed the Labels with and opacity of zero which is the correct initial setting. This next screenshot also shows the dialog, but with the Labels' opacities set to 1.
To keep the GridPane appearing centered, the column width of the third column – usually with hidden controlls – is deducted from the padding of the right side of the GridPane.
Model
The ListView displays Player objects. A Player is a domain object that contains playerId, playerName and team String fields. This is the code for the Player class. The playerId is generated from a simple counter which is a static class variable.
public class Player {

  private static int counter = 1;
  private final Integer playerId;
  private final String playerName;
  private final String team;

  public Player(String team, String playerName) {
    this.team = team;
    this.playerName = playerName;
	this.playerId = nextId();
  }

  private int nextId() { return counter++; }
  public static int getCounter() { return counter; }

  public Integer getPlayerId() { return playerId; }
  public String getPlayerName() { return playerName; }
  public String getTeam() { return team; }
The Player objects are maintained in an ObservableList called players. PlayersModel will be exposed to the UI as a property playersProperty. Callers bind the playersProperty when needing a complete list of the Player objects. For example, the UI might want to display a total.
public class PlayersModel {

  private final ObservableList<Player> players =
          FXCollections.observableArrayList();

  public ReadOnlyObjectProperty<ObservableList<Player>> playersProperty() {
          return new SimpleObjectProperty<>(players);
      }
PlayersModel uses a second data structure to hold the set of viewable Player objects. This data structure is a FilteredList (thanks @kleopatra_jx) called viewablePlayers which contains a Predicate in addition to the objects. viewablePlayers is based on players and will receive updates to players that match the Predicate. This FilteredList constructor applies the null Predicate which is no filter (all items are shown).
As with players, viewablePlayers is available as a property for binding. Callers -- like the ListView code presented later -- bind to this to get the filtered list of players
  private final FilteredList<Player> viewablePlayers = new FilteredList<>(players);

  public ReadOnlyObjectProperty<ObservableList<Player>> viewablePlayersProperty() {

    return new SimpleObjectProperty<>(viewablePlayers);
  }
Access to the underlying Predicate in viewablePlayers is provided to the callers via a convenience method. Callers bind to this property to cause a setPredicate() change to the FilteredList.
  public ObjectProperty<Predicate<? super Player>> filterProperty() {
            return viewablePlayers .predicateProperty();
  }
The PlayersModel class has operations that manipulate the players ObservableList and those manipulations will automatically update the viewablePlayers FilteredList. add() will add a Player object to the players ObservableList. The Predicate in viewablePlayers will determine whether or not that list will see the update. A remove() operation behaves in a similar fashion.
  public void add( Player p ) {
    players.add(p);
  }

 public void remove( Player p ) {
    players.remove( p );
  }
Finally, there is a test data method that adds Player objects on startup.
  public void loadTestData() {

    players.clear();
    viewablePlayers.clear();

    add(new Player("BOS", "David Ortiz"));
    add(new Player("BOS", "Jackie Bradley Jr."));
    add(new Player("BOS", "Xander Bogarts"));
    add(new Player("BOS", "Mookie Betts"));
    add(new Player("HOU", "Jose Altuve"));
    add(new Player("HOU", "Will Harris"));
    add(new Player("WSH", "Max Scherzer"));
    add(new Player("WSH", "Bryce Harper"));
    add(new Player("WSH", "Daniel Murphy"));
    add(new Player("WSH", "Wilson Ramos"));
  }
Main Controller
The main JavaFX Controller is called FilterListController. It supports the FilterList.fxml shown in the earlier Scene Builder screenshot.
FilterListController defines fields for the HBox and ListView controls in the FXML. The PlayersModel object is also instantiated. The ToggleGroup member holds a reference to a ToggleGroup that is used for multiple ToggleButton create calls.
public class FilterListController {

    @FXML
    private ListView<Player> lvPlayers;

    @FXML
    private HBox hboxFilters;

    private final PlayersModel playersModel = new PlayersModel();

    private ToggleGroup filtersGroup = new ToggleGroup();
The initialize() method starts by loading test data into playersModel. The ListView is then assigned with a custom cellFactory PlayerListCell. The itemsProperty of the ListView is bound to the playersModel viewablePlayers property; this enables the ListView to receive updates when the model changes. A ContextMenu is set for the delete operation.
public void initialize() { playersModel.loadTestData(); lvPlayers.setCellFactory( (lv) -> new PlayerListCell() ); lvPlayers.itemsProperty().bind( playersModel.viewablePlayersProperty() ); lvPlayers.setContextMenu( createContextMenu() );
The initialize() continues with code for dynamically building the filter ToggleButtons. The current list of Teams is extracted which will provide the arguments for each of the ToggleButtons.
  List<String> teams = playersModel.playersProperty().get()
      .stream()
      .map( (p) -> p.getTeam() )
      .distinct()
      .collect(Collectors.toList());
The initialize method closes by clearing out the placeholder HBox ToggleButtons – used only as a design aid – and replaces the HBox contents with ToggleButtons based on the list of teams and an additional ToggleButton for “Show All”.
  hboxFilters.getChildren().clear();
     hboxFilters.getChildren().add(
           createToggleButton("Show All", new TeamMatcher("*"))
 );

  teams
    .stream()
    .forEach( (t) -> hboxFilters.getChildren().add(
        createToggleButton(t, new TeamMatcher(t) ))
  );
Referring back to the start of initialize(), this is the code for the custom ListCell. It forms a String out of the playerName and team fields.
static class PlayerListCell extends ListCell<Player> {

    @Override
    protected void updateItem(Player p, boolean empty) {
        super.updateItem(p, empty);

        if( p == null || empty ) {
            setText( null);
        } else {
            setText( p.getPlayerName() + " (" + p.getTeam() + ")" );
        }
    }
}
The code for the ContextMenu added to the ListView is the following. The ContextMenu shows a Delete MenuItem with a right-click. Selecting this will affect the model directly via the remove() method. Because of binding, this will automatically update the UI.
private ContextMenu createContextMenu() {
    ContextMenu cm = new ContextMenu();
    MenuItem mi = new MenuItem("Delete");
    mi.setOnAction( (evt) -> {
        Player selectedP = lvPlayers.getSelectionModel().getSelectedItem();
        if( selectedP != null ) {
            playersModel.remove(selectedP);
        }
    });
    cm.getItems().add( mi );
    return cm;
}
In the section of the initialize() method for building the filter ToggleButtons, the createToggleButton() method was mentioned. This is the code.
private ToggleButton createToggleButton(String label, TeamMatcher matcher) {
    ToggleButton tb = new ToggleButton(label);
    tb.setUserData( matcher );
    tb.setOnAction( toggleHandler );
    tb.setToggleGroup( filtersGroup );
    return tb;
}
TeamMatcher is a class used for a case-insensitive comparison of a team. It also handles the “Show All” case.
static class TeamMatcher implements Predicate<Player> {

    private final String team;
    public TeamMatcher(String team) {
        this.team = team;
    }
    @Override
    public boolean test(Player player) {
        if( player == null || team == null ) return false;
        if( team.equals("*") ) {  // for show all
            return true;
        }
        return team.equalsIgnoreCase(player.getTeam());
    }
}
The TeamMatcher is applied to the playersModel by setting the filterProperty. This Lambda is a class member. The userData associated with a ToggleButton conveys the specific Predicate that will be applied when the ToggleButton is pressed.
private EventHandler
      <ActionEvent> toggleHandler = event -> {
    ToggleButton tb = (ToggleButton)event.getSource();
    Predicate<Player> filter = (Predicate<Player>)tb.getUserData();
    playersModel.filterProperty().set( filter );
    };
When the filterProperty is modified, the viewablePlayersProperty will be modified and the UI updated. Recall that the filterProperty affects the viewablePlayersProperty through a listener in playersModel.
The remaining method in the FilterListController class is the showAddPlayer() handler put on the + Button. This will create a Stage showing the Player Dialog. FilterListController also passes the PlayersModel object to PlayerController.
  @FXML
  public void showAddPlayer() {

    try {

    FXMLLoader fxmlLoader =
        new FXMLLoader(FilterListController.class.getResource("/Player.fxml"));

    Parent p = fxmlLoader.load();

    PlayerController c = fxmlLoader.getController();

    Scene scene = new Scene(p);

    Stage stage = new Stage();
    stage.setScene( scene );
    stage.setTitle("Add Player");
    stage.setOnShown( (evt) -> {
        c.setModel( playersModel );
    });
    stage.show();

    } catch(IOException exc) {
        exc.printStackTrace();
    }
    }
Player Dialog
As with the main view, the Player Dialog is implemented as FXML backed by a JavaFX Controller “PlayerController”. The Player Dialog shows a TextField and ComboBox which gathers the input for an add() operation on the PlayersModel. The Player Dialog was presented in an earlier pair of screenshots.
The PlayerController class starts with a few fields from the .fxml file and a reference to the model which was passed in using an onShown() handler on the Stage of PlayerController.
public class PlayerController {

    @FXML
    TextField tfPlayerName;

    @FXML
    private ComboBox<String> cmbTeam;

    @FXML
    private Label lblErrPlayerName, lblErrTeam;

    private PlayersModel model;
The setModel() method is called when the Player Dialog is shown. This method sets the model reference and fills the ComboBox with teams.
  public void setModel( PlayersModel model ) {

    this.model = model;

    List<String> teams =
    this.model.playersProperty().get()
        .stream()
        .map( (p) -> p.getTeam() )
        .distinct()
        .collect(Collectors.toList());

    cmbTeam.setItems(FXCollections.observableArrayList( teams ) );
    }
The handlers for the two Buttons – Add and Cancel – are presented below. addPlayer() will validate the input. If validation passes, the operation will add a Player object to the model and hide the window. The cancel() method simply hides the window.
  @FXML
  public void addPlayer(ActionEvent evt) {

    List<String> validationErrors = validate();

    if( validationErrors.isEmpty() ) {
        model.add( new Player(
          cmbTeam.getSelectionModel().getSelectedItem(), tfPlayerName.getText())
        );
        hide( evt );
    }
    }

  @FXML
  public void cancel(ActionEvent evt) { hide(evt); }

  private void hide(ActionEvent evt) {
    ((Button)evt.getSource()).getScene().getWindow().hide();
  }
The validate() method will manipulate the UI by fading in a pair of red asterisk Labels which are normally hidden. A List of errors is returned. The caller is simply checking the presence of a validation error to proceed with the add() operations. However, the list could also be used to present more information to the user in the form of a ToolTip.
  private List<String> validate() {

    List<String> validationErrors = new ArrayList<>();

    if( tfPlayerName.getText() == null ||
        tfPlayerName.getText().isEmpty() ) {
        fadeIn( lblErrPlayerName );
        validationErrors.add("Player Name is required.");
    }

    if( cmbTeam.getSelectionModel().getSelectedItem() == null ) {
        fadeIn( lblErrTeam );
        validationErrors.add("Team is required.");
    }

    return validationErrors;
    }
This is the code used to wrap up the FadeTransitions for the error Labels. These animations, while not part of the functional requirements, are important to making an app look professional and in line with other platforms such as iOS. It is jarring to have UI indicators appear instantaneously.
  private void fadeIn(Label lbl) {
    FadeTransition ft = new FadeTransition(Duration.millis(500), lbl);
    ft.setFromValue( 0.0d );
    ft.setToValue( 1.0d );
    ft.play();
    }

  private void fadeOut(Label lbl) {
    FadeTransition ft = new FadeTransition(Duration.millis(500), lbl);
    ft.setFromValue( 1.0d );
    ft.setToValue( 0.0d );
    ft.play();
    }
Finally, the initialize() method sets up two focus listeners that will clear the error Labels as the user corrects the input. After the user presses the Add Button with invalid input, the Label associated with the invalid control will fade in. When the user navigates back into that control to correct the input, the error Label will automatically fade out.
  public void initialize() {

    tfPlayerName.focusedProperty().addListener(
        (obs,ov,nv) -> {
            if (nv) {
                if (lblErrPlayerName.getOpacity() == 1.0d) {
                    fadeOut(lblErrPlayerName);
                }
            }
        }
    );

    cmbTeam.focusedProperty().addListener(
        (obs,ov,nv) -> {
            if( nv ) {
                if( lblErrTeam.getOpacity() == 1.0d ) {
                    fadeOut(lblErrTeam);
                }
            }
        }
    );
    }
Main
For completeness, the standard JavaFX Application subclass is presented below.
public class FilterListApp extends Application {

    @Override
    public void start(Stage primaryStage) throws Exception {

        Parent p = FXMLLoader.load(
            FilterListApp.class.getResource("/FilterList.fxml")
        );

        Scene scene = new Scene(p);

        primaryStage.setTitle( "FilterListApp" );
        primaryStage.setScene( scene );
        primaryStage.setHeight( 667 );
        primaryStage.setWidth( 376 );
        primaryStage.setOnShown( (evt) -> {
        primaryStage.setMinHeight(primaryStage.getHeight());
        primaryStage.setMinWidth(primaryStage.getWidth());
        });
        primaryStage.show();
    }

    public static void main(String[] args) {
        launch(args);
    }
}
This article showed how to filter a ListView by managing a pair of ObservableLists in a model class. One list contained the full set of model objects while the other list contained the viewable items. The app determined the list of viewable items through a filter that was set on the model. JavaFX Binding was the key to keeping everything in sync while retaining a strict separation of concerns that helps with later maintenance.
Resources
The source code presented in this video series is a Gradle project that can be imported into your IDE.
FilterListApp Source Zip (12Kb)
By Carl Walker
President and Principal Consultant of Bekwam, Inc