Custom JavaFX Dialog Layout
September 5, 2016
This guide shows how to layout a custom dialog in JavaFX. The UI tool Scene Builder is used to add components to a Scene Graph. Several containers are added to support the layout. The alignments are adjusted to position the controls correctly in the dialog. Finally, the resize policies of the containers and components are set which snaps everything into place.
The JavaFX layout is based on containers as in Swing and GTK. This is different than the design of the iOS constraint-based layout or the absolute/relative/fixed/static model used in web programming. Selecting the right container for the desired layout is key. This guide covers two containers: VBox and HBox.
VBox stacks components vertically and HBox stacks controls horizontally. A VBox stretches to fit the height of its container – which can be the toplevel Stage and Scene – and also the width if the Fill Width property is set. An HBox stretches to fit the width of its container and also the height if the Fill Height property is set.
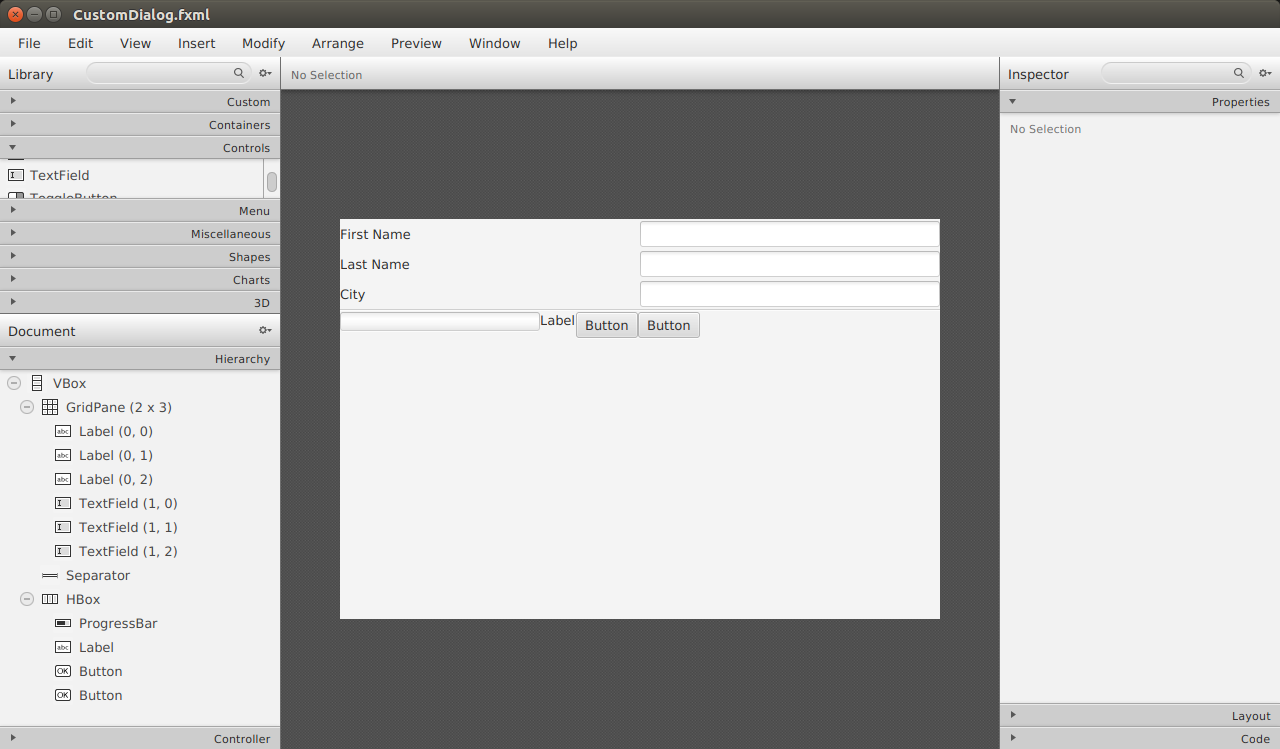
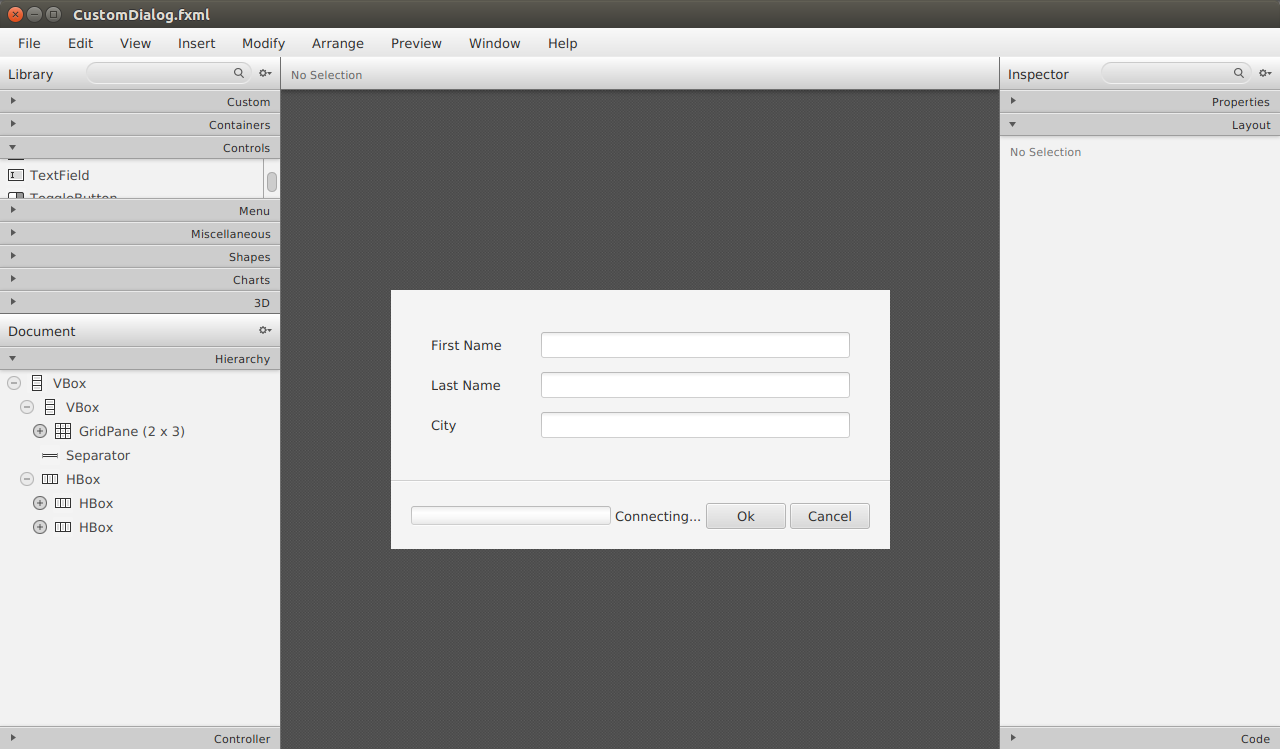
This example starts with the following containers and controls added to Scene Builder. All of the defaults are preserved. A toplevel VBox contains a GridPane, a horizontal Separator, and an HBox. The GridPane contains TextField controls that make up a form. The HBox contains a ProgressBar and Buttons. (As an aside, the ProgressBar and related Label would not be visible initially and would only be shown if there were a running Task.)
First, set some basic widths and margins.
- On the toplevel VBox, set both the prefWidth and the prefHeight to USE_COMPUTED_SIZE.
- Select the GridPane, set all four Margin values to 40. Set the Hgap and Vgap to 10.
- Select the HBox, set all four Margin values to 20. Set the Spacing to 4. Set the prefWidth and the prefHeight to use USE_COMPUTED_SIZE.
Scene Builder should now look like this.

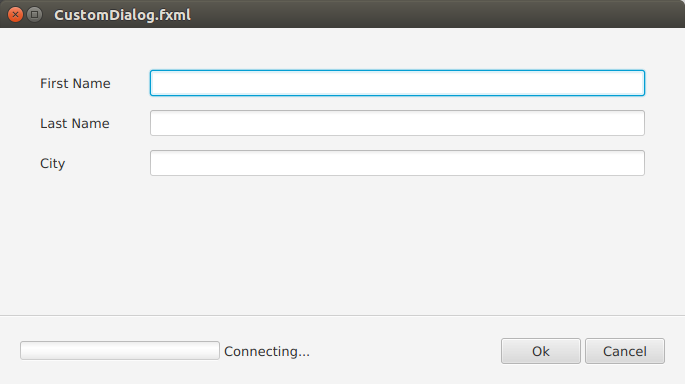
In Scene Builder, the custom dialog is not too misaligned. However, resizing the dialog reveals gaps and positioning problems. From within Scene Builder, I press Control-P to bring up a window to interact with the layout. See the following screenshot.
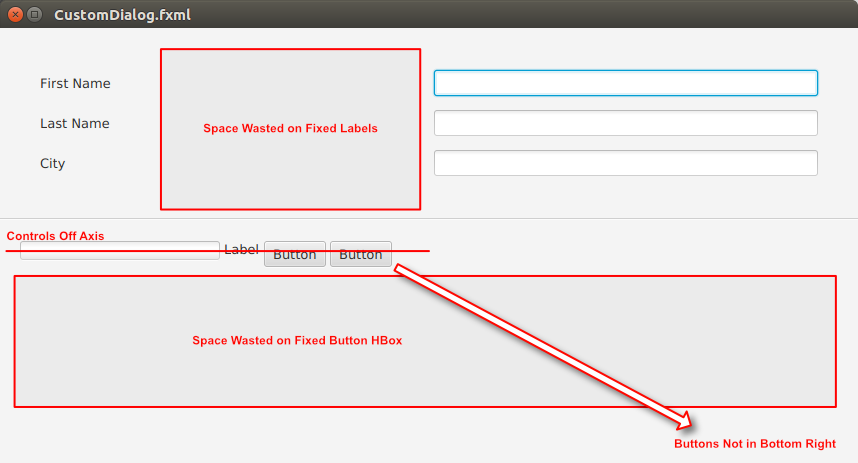
The problems are
- The lower HBox containing the Buttons and and ProgressBar is fixed yet takes up all the available space.
- The Buttons have drifted over to the left and should be in the bottom right.
- The Buttons are not inline with the Progress controls.
- The top GridPane containing the TextFields is sharing the available width despite the fixed size of the Labels.
Add Containers
To properly allocate the extra window space among the top GridPane and bottom HBox, set some resize rules.
- Wrap the top GridPane in a VBox. This will make the hierarchy of the top part of the dialog VBox > VBox > GridPane.
- On the newly-created VBox, set the Vgrow property to Always.
- On the lower HBox, set the Vgrow property to Never.
Displaying the window shows the top VBox (the wrapped GridPane) taking up all the extra space and the lower HBox remaining fixed.
Layout Lower HBox
- Next, set the Label and the Button text to “Connecting...”, “Ok”, and “Cancel”.
- Set the prefWidth of each Button to 80.
- Select the ProgressBar and the Label in the Hierarchy. Right-click and select Wrap In > HBox. Set the Spacing for this new HBox to 4. Set the Hgrow to NEVER. Set the Alignment to CENTER_RIGHT.
- Select the two Buttons in the Hierarchy. Right-click and select Wrap In > HBox. Set the Spacing to 4. Set the Hgrow to ALWAYS. Set the Alignment to CENTER_LEFT.
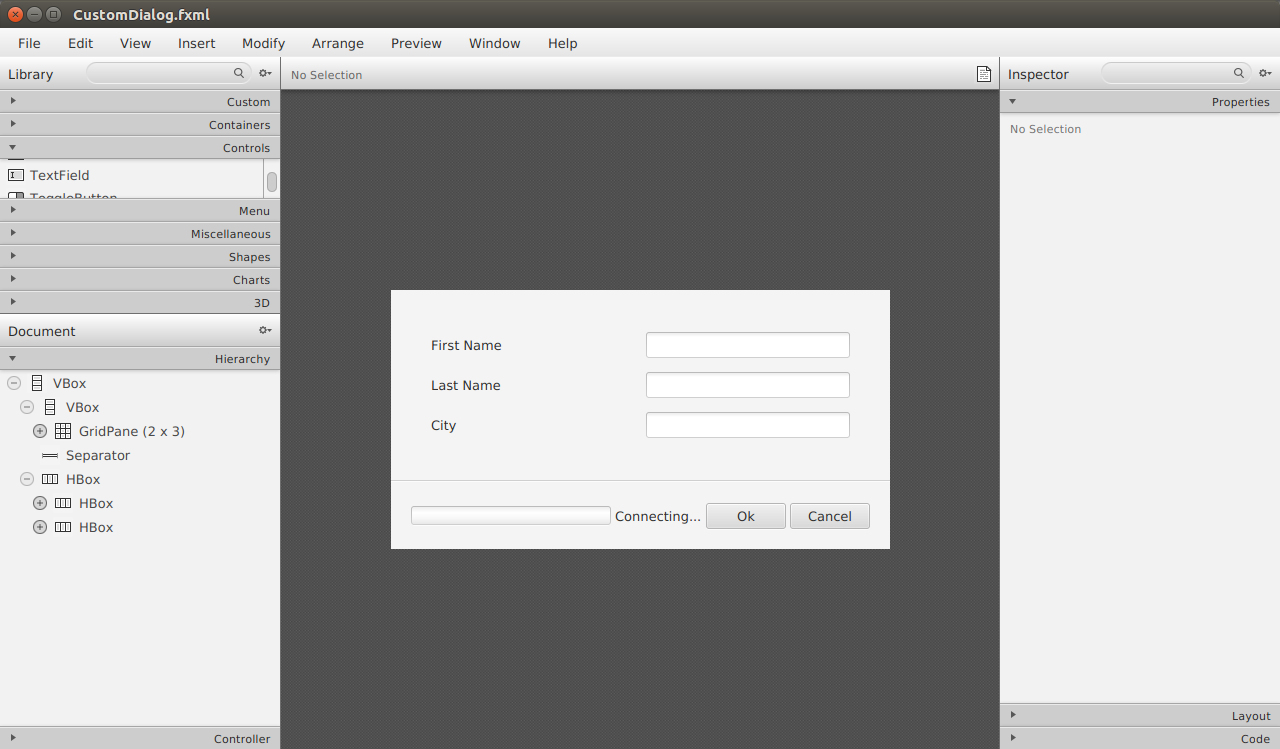
Scene Builder should look like this now.
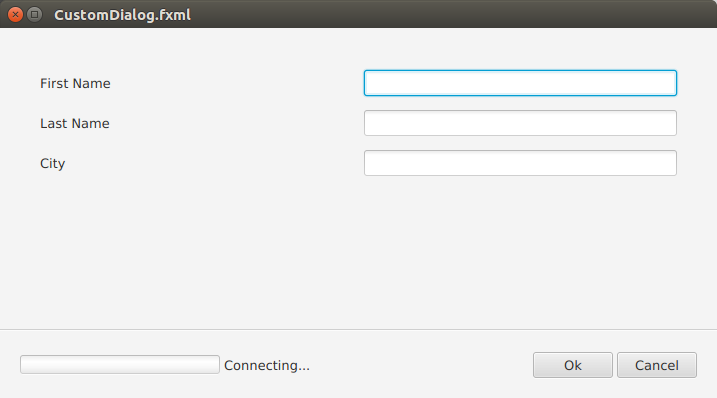
And resizing the window should look like this.
Fix GridPane
The remaining item to deal with is the GridPane which is distributing the available space equally among the Label column and the TextField column. Any extra space should go to the TextField since that is the only part of the form that will vary.
To do this,
- Select the first column in the GridPane and set the ColumnConstraints Hgrow value to NEVER.
- Select the second column in the GridPane and set the ColumnConstraints Hgrow value to ALWAYS.
This screenshot shows the finished product in Scene Builder.
This screenshot shows the resized window. Recall that this can quickly be displayed in Scene Builder with the Control-P option.
Choosing the right container arrangement in JavaFX is key to a good layout. While you have lots of flexibility in setting absolute positions using containers like Panel, this can often lead to a brittle layout. A far more stable design will let the containers manage child components based on the alignment and resize settings. For most of my JavaFX work in business applications, I only use VBox, HBox, GridPane, and an occasional StackPane for layering.
Resources
If your project differs from the guide, check out the final FXML file here. You can go control-by-control to compare the values.

By Carl Walker
President and Principal Consultant of Bekwam, Inc